
|
|
|
 |
 |
 |
Location: Jerusalem Description: Pool of Bethesda. |
|
 |
 |
 |
Location: Jerusalem Description: "Gordon's Calvary," appearing as a skull. |
|
 |
 |
 |
Location: Jerusalem Description: The Fortress of Antonia (Model). |
|
 |
 |
 |
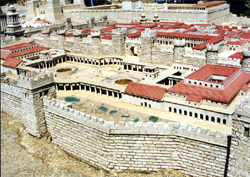
Location: Jerusalem Description: Herod's palace with the Temple Mount in the background (Model). |
|
 |
 |
 |
Location: Jerusalem Description: The Damascus Gate. |
|
 |
 |
 |
Location: Jerusalem Description: The Pool of Siloam at the end of Hezekiah's tunnel. |
|
 |
 |
 |
Location: Jerusalem Description: Tomb of Ben Hazir in the Kidron Valley. |
|
 |
 |
 |
Location: Jerusalem Description: Pool of Siloam. |
|
 |
 |
 |
Location: Jerusalem Description: The Garden Tomb. |
|
 |
 |
 |
Location: Jerusalem Description: View of the Temple Mount across the Kidron Valley from the Mount of Olives. |
|
 |
 |
 |
Location: Jerusalem Description: Robinson's Arch, with the excavated Herodian street below. |
|
 |
 |
 |
Location: Jerusalem Description: Street in Old Jerusalem. |
|
 |
 |
 |
Location: Jerusalem Description: Pool of Siloam. |
|
 |
 |
 |
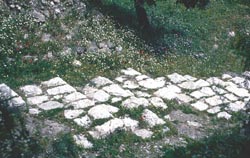
Location: Jerusalem Description: Steps leading down to the Tyropoean Valley from "Gallicantu," a traditional site of Caiaphas' house. Jesus may have used these steps. |
|
 |
 |
 |
Location: Jerusalem Description: Steps leading down from to the Tyropoean Valley from the traditional site of Caiaphas' house. Jesus may have used these steps. |
|
 |
 |
 |
Location: Jerusalem Description: Steps leading down to the Tyropoean Valley from the traditional site of Caiaphas' house. Jesus may have used these steps. |
|
 |
 |
 |
Location: Jerusalem Description: Looking west across the Kidron Valley at the southern end of the Temple Mount and Ophel (left center) from the Mount of Olives. |
|
 |
 |
 |
Location: Jerusalem Description: Robinson's Arch on the Western Wall of the Temple Mount, with shops below. |
|
 |
 |
 |
Location: Jerusalem Description: Looking west across the Kidron Valley from the Mount of Olives. |
|
 |
 |
 |
Location: Jerusalem Description: Map of the First Temple in Jerusalem, during the Iron Age, showing the topography of the valleys. |
|
 |
 |
 |
Location: Jerusalem Description: Jerusalem area, looking southeast from Nebi Samuel toward the Mount of Olives on the horizon. |
|
 |
 |
 |
Location: Jerusalem Description: This rolling-stone tomb, found near Mishmar ha-Emeq, is typical of those used in the first century, probably similar to the tomb in which Jesus was buried. |
|
 |
 |
 |
Location: Jerusalem Description: The Pool of Siloam at the end of Hezekiah's tunnel. |
|
 |
 |
 |
Location: Jerusalem Description: Stepped-stone retaining wall from the City of David (10th century B.C.). |
|
 |
 |
 |
Location: Jerusalem Description: Mount of Olives from the southern wall of the Temple Mount. |
|
 |
 |
 |
Location: Jerusalem Description: Stepped-stone retaining walls in the area of Jebus on the west side of the Kidron Valley. |
|
 |
 |
 |
Location: Jerusalem Description: The Temple Mount viewed from the Mount of Olives. |
|
 |
 |
 |
Location: Jerusalem Description: Hezekiah's Wall (Isa 22:10), discovered after the Six Day War (1967) before the Jewish Quarter was rebuilt. The scale to the left shows its original height. |
|
 |
 |
 |
Location: Jerusalem Description: The lower structure is the Jebusite and Israelite Water Gate. Above are the retaining walls built in the 1960s by Kenyon. |
|
 |
 |
 |
Location: Jerusalem Description: Overview of Herodian Jerusalem looking south eastward (Model). |
|
 |
 |
 |
Location: Jerusalem Description: The base of Hezekiah's Wall. The vertical measure indicates its original height. |
|
 |
 |
 |
Location: Jerusalem Description: Model of Herodian Jerusalem, looking southwest. |
|
 |
 |
 |
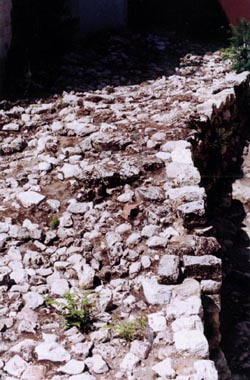
Location: Jerusalem Description: Section of Hezekiah's northwest city wall. |
|
 |
 |
 |
Location: Jerusalem Description: The Water Gate (lower center) and Kenyon's retaining wall (above). |
|
 |
 |
 |
Location: Jerusalem Description: Hezekiah's tunnel. |
|
 |
 |
 |
Location: Jerusalem Description: Looking eastward across Herodian Jerusalem (Model). |
|
 |
 |
 |
Location: Jerusalem Description: The Dome of the Rock on the Temple Mount, from the Mount of Olives. |
|
 |
 |
 |
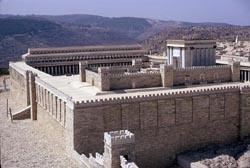
Location: Jerusalem Description: Temple Mount, looking southwestward (model). The Court of the Gentiles occupied the open space between the walls and the enclosure of the temple. |
|
 |
 |
 |
Location: Jerusalem Description: City of David area. The stepped-stone retaining wall (10th century B.C.) and pillars of Ahiel's house (7th century B.C.). |
|
 |
 |
 |
Location: Jerusalem Description: Looking southeastward at the Temple Mount (Model). |
|
 |
 |
 |
Location: Jerusalem Description: Herod's temple, looking westward (model). The Court of the Gentiles occupied the open space (left and right) between the walls and the enclosure of the temple. |
|
 |
 |
 |
Location: Jerusalem Description: Herod's Temple (Model). |
|
 |
 |
 |
Location: Jerusalem Description: Tyropoean Valley (center left) in Herodian Jerusalem model. |
|
 |
 |
 |
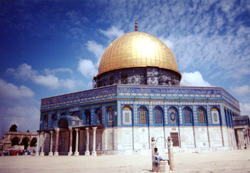
Location: Jerusalem Description: The Dome of the Rock on the Temple Mount at approximately the site of Herod's temple. |
|
 |
 |
 |
Location: Jerusalem Description: A tunnel used to bring water into the Temple Mount during the Hasmonean period. |
|
 |
 |
 |
Location: Jerusalem Description: Robinson's Arch at the southwest corner of the Temple Mount (before the street below was excavated). |
|
 |
 |
 |
Location: Jerusalem Description: The remains of Robinson's Arch at the southwest corner of the Temple Mount. |
|
 |
 |
 |
Location: Jerusalem Description: Robinson's Arch, (the base of the large staircase descending to the Herodian street below) on the southwestern corner of the Temple Mount. |
|
 |
 |
 |
Location: Jerusalem Description: The southern side of the Temple with the Royal Portico in the foreground (Model). |
|
 |
 |
 |
Location: Jerusalem Description: Royal Portico of Herod's Temple, the southern wall of the Temple Mount. Worshippers entered and exited through these gates (Model). |
|
 |
 |
 |
Location: Jerusalem Description: The Hulda Street Gates on the southern wall of the Temple Mount. |
|
 |
 |
 |
Location: Jerusalem Description: Staircase of the Royal Portico at the southern wall of the Temple Mount, with blocked Hulda Gates. |
|
 |
 |
 |
Location: Jerusalem Description: The Triple Gate on the southern wall of the Temple Mount. |
|
 |
 |
 |
Location: Jerusalem Description: An original archway over one of the Hulda Gates on the southern wall of the Temple Mount. |
|
 |
 |
 |
Location: Jerusalem Description: Excavation along the southern wall of the Temple Mount. Looking eastward toward the Mount of Olives. |
|
 |
 |
 |
Location: Jerusalem Description: Excavation at the southwest corner of the Temple Mount. |
|
 |
 |
 |
Location: Jerusalem Description: The eastern wall of the Temple Mount showing the several stages of construction. |
|
 |
 |
 |
Location: Jerusalem Description: The eastern wall of the Temple Mount. Note the "seam" where Herod extended the wall (lower level) southward (left) to enlarge the Temple Mount. |
|
 |
 |
 |
Location: Jerusalem Description: Looking northward along the eastern wall of the Temple Mount. |
|
 |
 |
 |
Location: Jerusalem Description: The Western Wall of the Temple Mount, showing Herodian stones near the base and later additions above. |
|
 |
 |
 |
Location: Jerusalem Description: The Western Wall with the Dome of the Rock above. |
|
 |
 |
 |
Location: Jerusalem Description: Praying at the Western Wall of the Temple Mount. |
|
 |
 |
 |
Location: Jerusalem Description: Praying at the Western Wall of the Temple Mount. |
|
 |
 |
 |
Location: Jerusalem Description: The Western Wall of the Temple Mount, constructed by Herod the Great. Herodian stones are distinguished by a smooth, narrow frame around the faces. |
|
 |
 |
 |
Location: Jerusalem Description: Men praying at the Western Wall. Written prayers are placed in the cracks between the stones. |
|
 |
 |
 |
Location: Jerusalem Description: Bar Mizvah at the Western Wall. |
|